ezCheckPrinting Software: How can customers share the same database by using a shared folder
With ezCheckPrinting software multiple-user version, customers can share the data over network easily. If you do not have a data server, you can follow this guide to share the data by using a shared folder.
Step 1: Set up the first machine
1.1 Add a new folder first. It will be used as the shared data folder.
1.2 Share the folder to others
1.3 Start ezCheckPrinting and copy data to this shared folder
Click ezCheckPrintng top menu "Accounts" then "Duplicate Current Account". Please enter a new account name with letters and number only. For example: "Bank ABC Shared" or "Company XYZ".
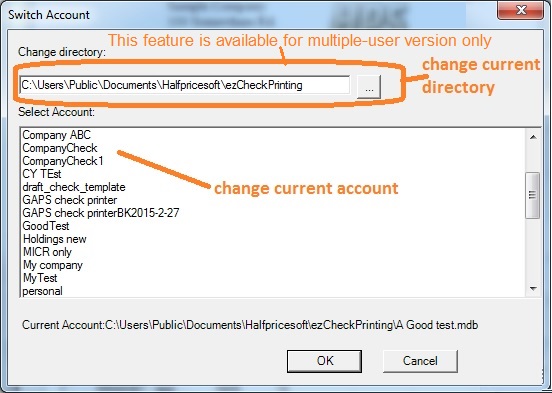
1.4 Change the ezCheckPrinting database path to use the shared file
Click ezCheckPrintng top menu "Accounts" then "Select Account".
Step 2: On the second machine
2.1 Create a new map drive
Open file explore, select My PC (or This PC or My Computer), right click the mouse button to map network drive
2.2 Start ezCheckPrinting and switch the current database path to use shared file