ezTimeSheet Quick Start Guide
How to Set up PC Employee Time Clock
ezTimeSheet employee timeclock automates time tracking on attendance, PTO, vacation, sick and eliminates payroll errors. You can install in on a shared machine as punch clock and you can also install it on each employee machine for time tracking.
Here is the step by step guide on how to install it on a single machine as PC Punch Clock for restaurants, retail stores, manufactures, doctor office and more.
Step 1: Start ezTimeSheet, login as Administrator
You can click the ezTimeSheet top menu "Administrator" then click "Login" sub menu to open log in screen.
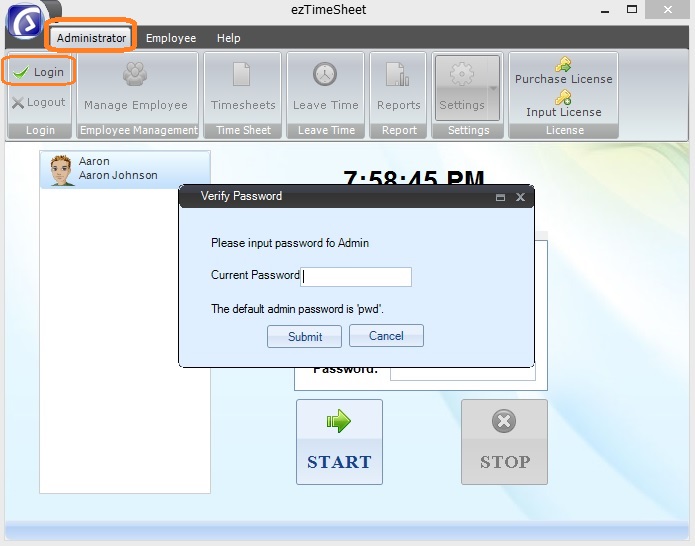
(Click image to enlarge)
Step 2: Set up Company Settings
You can click top menu "Adminstrator->Settings" then click "Company Settings" sub menu to open company setup screen.
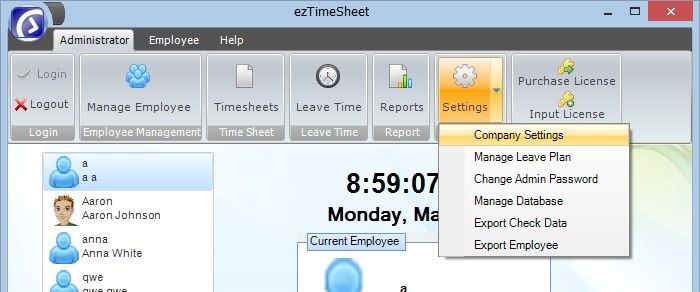
(Click image to enlarge)
You can click top menu "Adminstrator->Settings" then click "Company Settings" sub menu to open company setup screen.
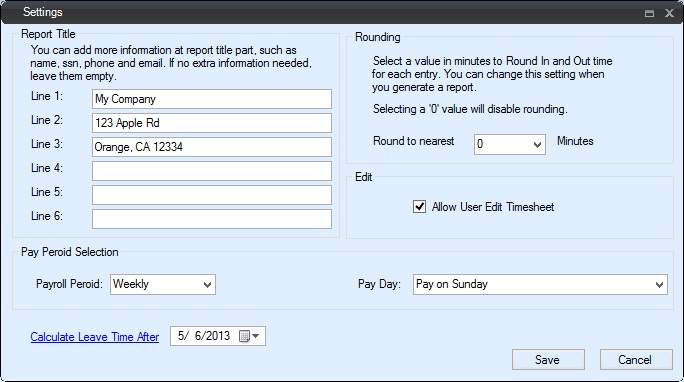
(Click image to enlarge)
Step 3: Set up Leave Plan(Optional)
ezTimeSheet can also be used to tracking employee vacation, leave and sick time. You can
learn more details here 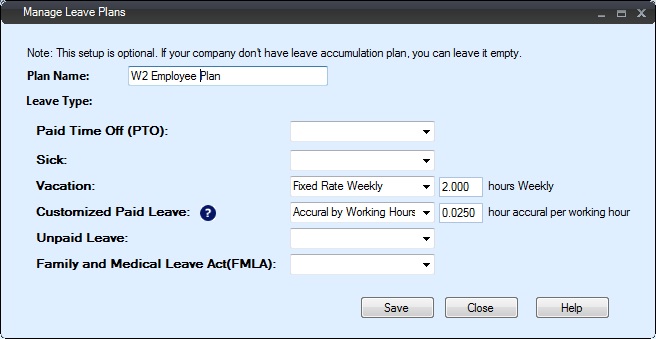
(Click image to view details)
Step 4: Add New Employee
You can click top menu "Adminstrator" then click "Manage Employee" sub menu to open Manage Employee screen.
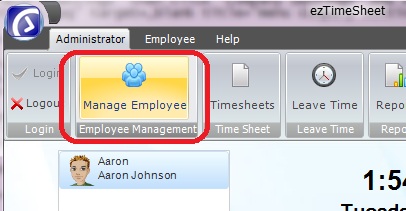
You can click "New" button to add new employee.
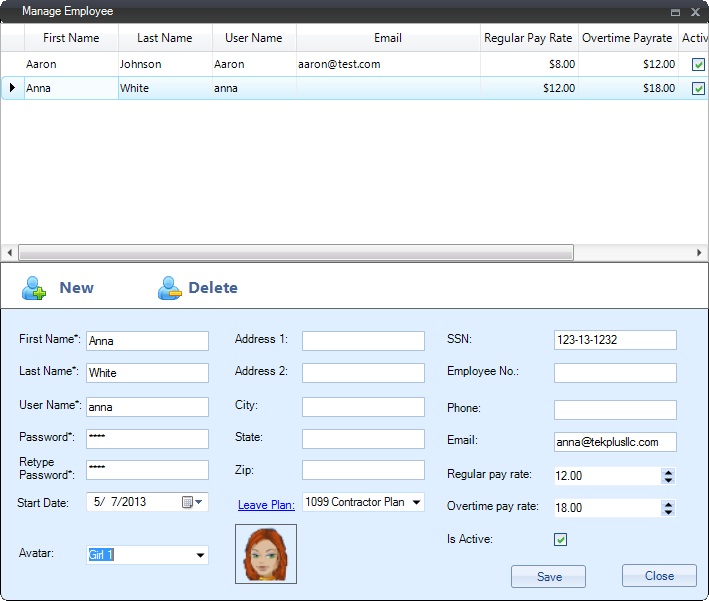
(Click image to enlarge)
Step 5: Employee Time In/Time Out
If you are still log in as administrator, log out first. EzTimeSheet software is ready for your employees to time in and time out.
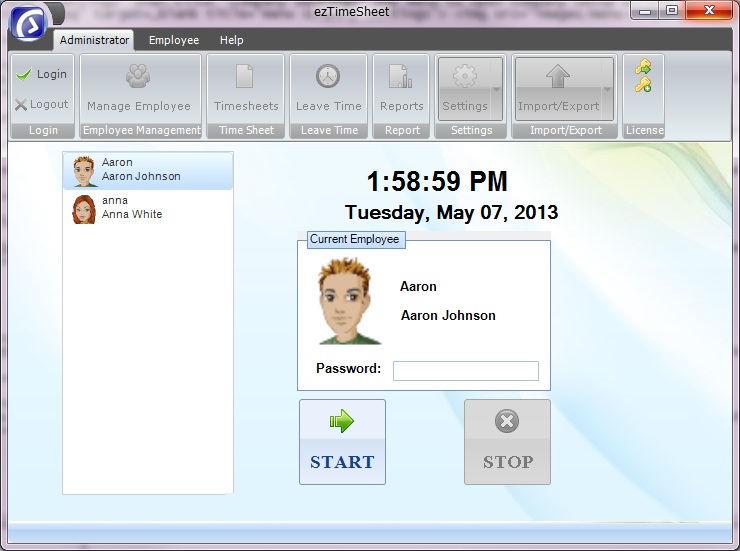
(Click image to enlarge)
Step 6: Administrator View Report
Administrator can log in to view/edit timesheet. Administrator can also view report.
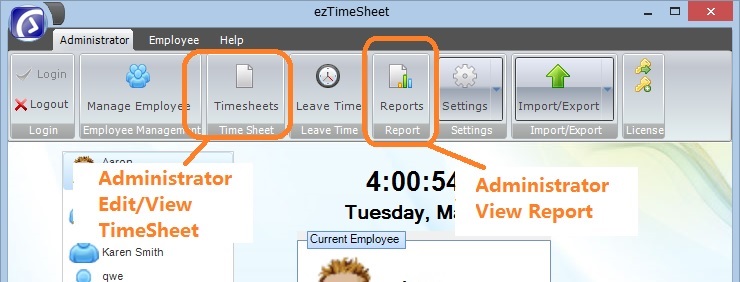
(Click image to enlarge)
Related Links: